Wednesday, 5 January 2011

christmas sweetie kebabs

Recently I have gotten a bit interested/obsessed with a few party-planning blogs.  I'm not talking British jelly and ice cream parties, I'm talking extravagant, over the top, excessive, beautiful, American parties. Have a look at some of the absolutely gorgeous spreads over on the Blowout Party Blog  I mean, look at this one:
Have a click on it to see more close ups.

It was here that I stumbled across 'Candy Kabobs', which, translated into English becomes sweetie kebabs. I think i got a few cavities in my teeth by just looking at this incredible site, Sweets Indeed.  It worked out quite expensive to source the ingredients to make anything too crazy so I decided to make some mini christmas trees, using just red and green sweets.


I ordered myself a load of astro belts from Whirly Pop and picked up a bag of Haribo Super Sour Monsters and set to work making these pretty things...


Christmas Tree Cake Pops

For those of you who have not heard of the goddess that is Bakerella, I suggest you pop on over to her site and let your jaw slowly fall open.


When I saw her christmas tree pops, I just had to have a crack at it myself.  It's all been a bit hectic over christmas, baking-wise so I don't have many photos of the actual processes, but I reckon it's quite easy to figure out....or you could pop over and see how Bakerella does it!


I took a load of leftover cupcakes that were still good to eat, but a few days old and chucked them in my mixer and kept adding buttercream until they the mixture was at a consistency where I could mould it into little cone shapes.


I then stuck a lollypop stick in the end of each one before placing them on some baking paper on a tray and into the freezer where they remained for a few weeks, until it was time to dip!


When I took them out of the freezer, the sticks weren't quite secure enough so I pulled them out, dipped them in melted chocolate and then stuck them back in.  The chocolate dried instantly as the cake was still frozen.


To coat the cake, I used white candy melts which I melted in the microwave and then coloured green using gel food dye.  If you're not familiar with candy melts, they come in all different colours and and flavours and look like giant chocolate buttons.  They have the consistency of chocolate but they are much easer to use and melt because they don't need tempering like normal chocolate does, so that it dries shiny.


When this was ready, I took a cone of cake and dipped it into the chocolate, making sure that the whole thing was completely covered quite thickly.  I imagine there are a number of ways to achieve the spiked effect, but I found I got it looking best when I used the back of a spoon which I kept tapping lightly around the chocolate.  You've got to be really quick with this bit because the chocolate dries really quickly.


Then finally, I stuck on some sprinkles for lights, a dash of glitter and a little star, on the top.

Tuesday, 4 January 2011

Christmas Chocolate Marshmallows

I'm not sure how the idea for these came to me, perhaps it's because I've become a bit obsessed with cake pops recently and feel like I want to try and put everything on the end of a stick now. These were incredibly simple to make but looked so effective inside my christmas treat boxes!


To make these, you will need:

Marshmallows
White chocolate or white candy melts
lollypop sticks
sprinkles/glitter
christmas trees/snowflakes etc cut out of sugarpaste and left to dry
polystyrene

Begin by melting your chocolate either in a bowl over some boiling water or in the microwave. I used candy melts. Take your lolly stick and dip the end of it into some boiling water and then push it up into your marshmallow. It should slide in and then stick there.

Next, tilt your bowl of chocolate so that you can dip your marshmallow right into it, twist the lolly stick as you pull it out of the chocolate so that the excess comes off and you're left with chocolate swirled all the way round the marshmallow.

Then, sprinkle whatever you have chosen to decorate your marshmallow with and press on your christmas shape.

Press the stick into a block of polystyrene to allow it to dry.

TA DAAAA!


If you're interested in going the whole hog and actually making the marshmallows yourself, check out this post on the wonderful An American Cupcake in London blog


Mini Christmas Cakes

Happy New Year!


Hope everyone had a wonderful break and I also hope everyone over-indulged in all of the beautiful foods that we only seem to rustle up at this time of year.  Turkey, brussels, pigs in blankets and chocolate oranges are all just some of my weaknesses.  The bathroom scales have been hidden until further notice.

I decided to go for mini christmas cakes this year as I thought they would make nice gifts as well as nice puddings.


I followed a wonderful recipe for the fruitcakes which I found on the trusty BBC Good Food site. 


Ingredients
200g dark muscovado sugar
175g butter , chopped
700g luxury mixed dried fruits
50g glacé cherries
2 tsp grated fresh root ginger (I used ground ginger)
zest and juice 1 orange
100ml dark rum , brandy or orange juice
85g/3oz pecan nuts, roughly chopped (I used flaked almonds)
3 large eggs , beaten
85g ground almonds
200g plain flour
½ tsp baking powder
1 tsp mixed spice
1 tsp cinnamon

Method
Tip the sugar, butter, dried fruit, whole cherries, ginger, orange zest and juice into a large pan. Pour over the rum, brandy or juice, then put on the heat and slowly bring to the boil, stirring frequently to melt the butter. Reduce the heat and bubble gently, uncovered for 10 mins, stirring every now and again to make sure the mixture doesn't catch on the bottom of the pan. Set aside for 30 mins to cool.

Stir the nuts, eggs and ground almonds into the fruit, then sift in the flour, baking powder and spices. Stir everything together gently but thoroughly. Your batter is ready.

Heat oven to 150C/130C fan/gas 2. Scoop the cake mix into 12 deep muffin cases (an ice-cream scoop works well), then level tops with a spoon dipped in hot water. Bake for 35-45 mins until golden and just firm to touch. A skewer inserted should come out clean. Cool on a wire rack.

I learnt for next time, to flatten the batter as much as possible while it's in the cupcake case as these cakes don't rise very much and so you end up with quite an uneven top, which is fine if you don't want to ice them.  I ended up slicing off the odd bit here and there and really using my smoother to get my icing flat.

To ice the cakes, I rolled out my sugarpaste and then used a cookie cutter to cut out rounds that were roughly the same size as my cake.  I then let down some sugarpaste and placed a small amount on top of the fruitcake. Next, I carefully placed my circle of icing on top and used my smoother to gently flatten it.

Of the people that i knew would be eating my christmas cakes, about half loved marzipan and about half hated it and so, as I'm not particularly partial to it myself, I decided to leave it out.  If you're making these and want to add marzipan, all you would need to do would be to layer your sugarpaste on top of your rolled out marzpian before cutting out your circles and it should stick.


Finally, I decorated the tops of my cakes with snowflakes and holly which I had cut out and left to dry a few days before using my lovely new plunger cutters.


I was absolutely delighted with how these came out!  They tasted fantastic and because they're fruit cake (as long as you brush them with alcohol every few days and keep them in an air tight container) they are incredibly soft and moist. Not forgetting how pretty they look too!


Wednesday, 15 December 2010

Bra biscuits!


I was recently asked to provide 200 biscuits for the Breast Cancer Care Charity Ball in Huntingdon.  This was put together by my wonderful cousin Susan Rushworth.  She is such a hard-working and lovely person, it's no surprise that this was a fantastic event.  I ate some incredible food, listened to some awesome music and met some really inspiring people.

I found this on the Flickr page for the Applegum Kitchen where 
I also found a number of other delights
After scouring the internet for ideas, I happened to stumble across possible the best mould I've ever seen.  My various google searches for "underwear moulds" had retrieved a number of unwanted results so I was so pleased when I found what I was after. I hastily bought it from
Design - A - Cake  and pretty much sat by the letterbox until it arrived.

It took a number of different methods before I was able to properly bang these out.  I found that putting trex on the mould was not a good idea as it made it stick more.  Dusting it with cornflour tended to work but made the paste look a bit dull.  Eventually I found that using the better quality sugarpaste (Regalice) as opposed to own brand supermarket ones tended to have the highest success rate.  It's also important to make sure you clean the mould every now and then to stop sticking.

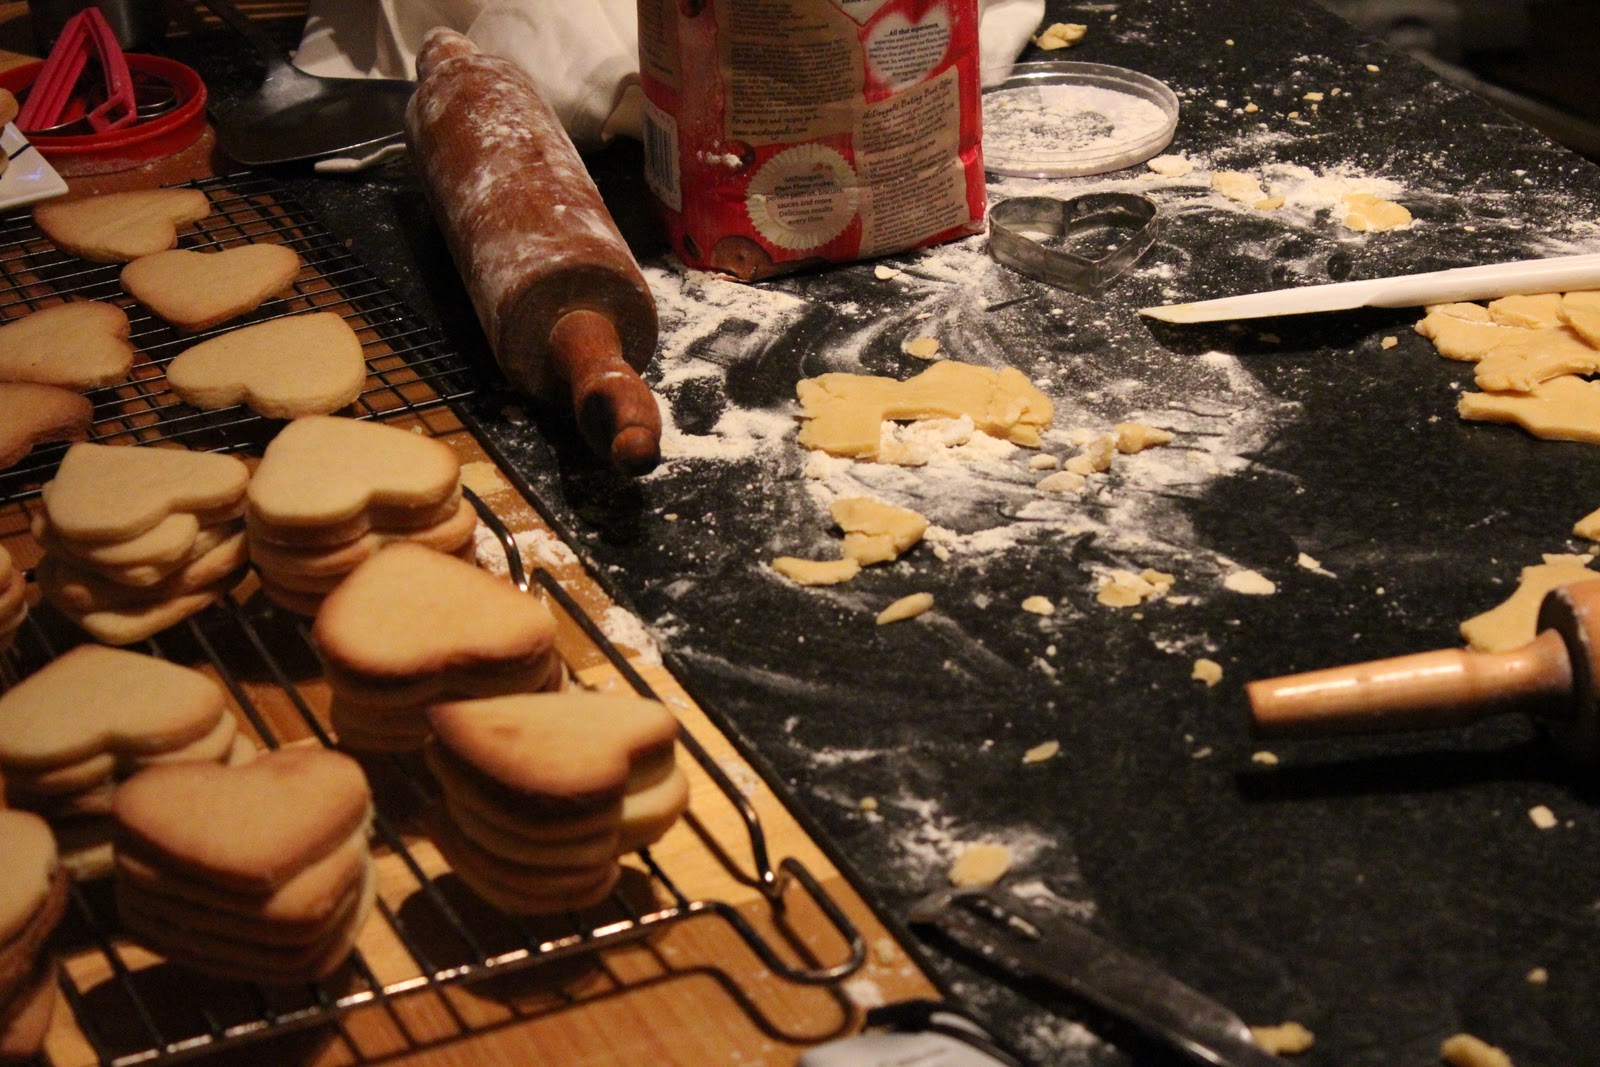
I made sure I began making all the components to these biscuits way in advance.

Bras were made a few weeks before and dusted a few days before bagging.

Biscuits were made about a week before and frozen

Tags were hand written (thanks mum, thanks Tom) a few days before.

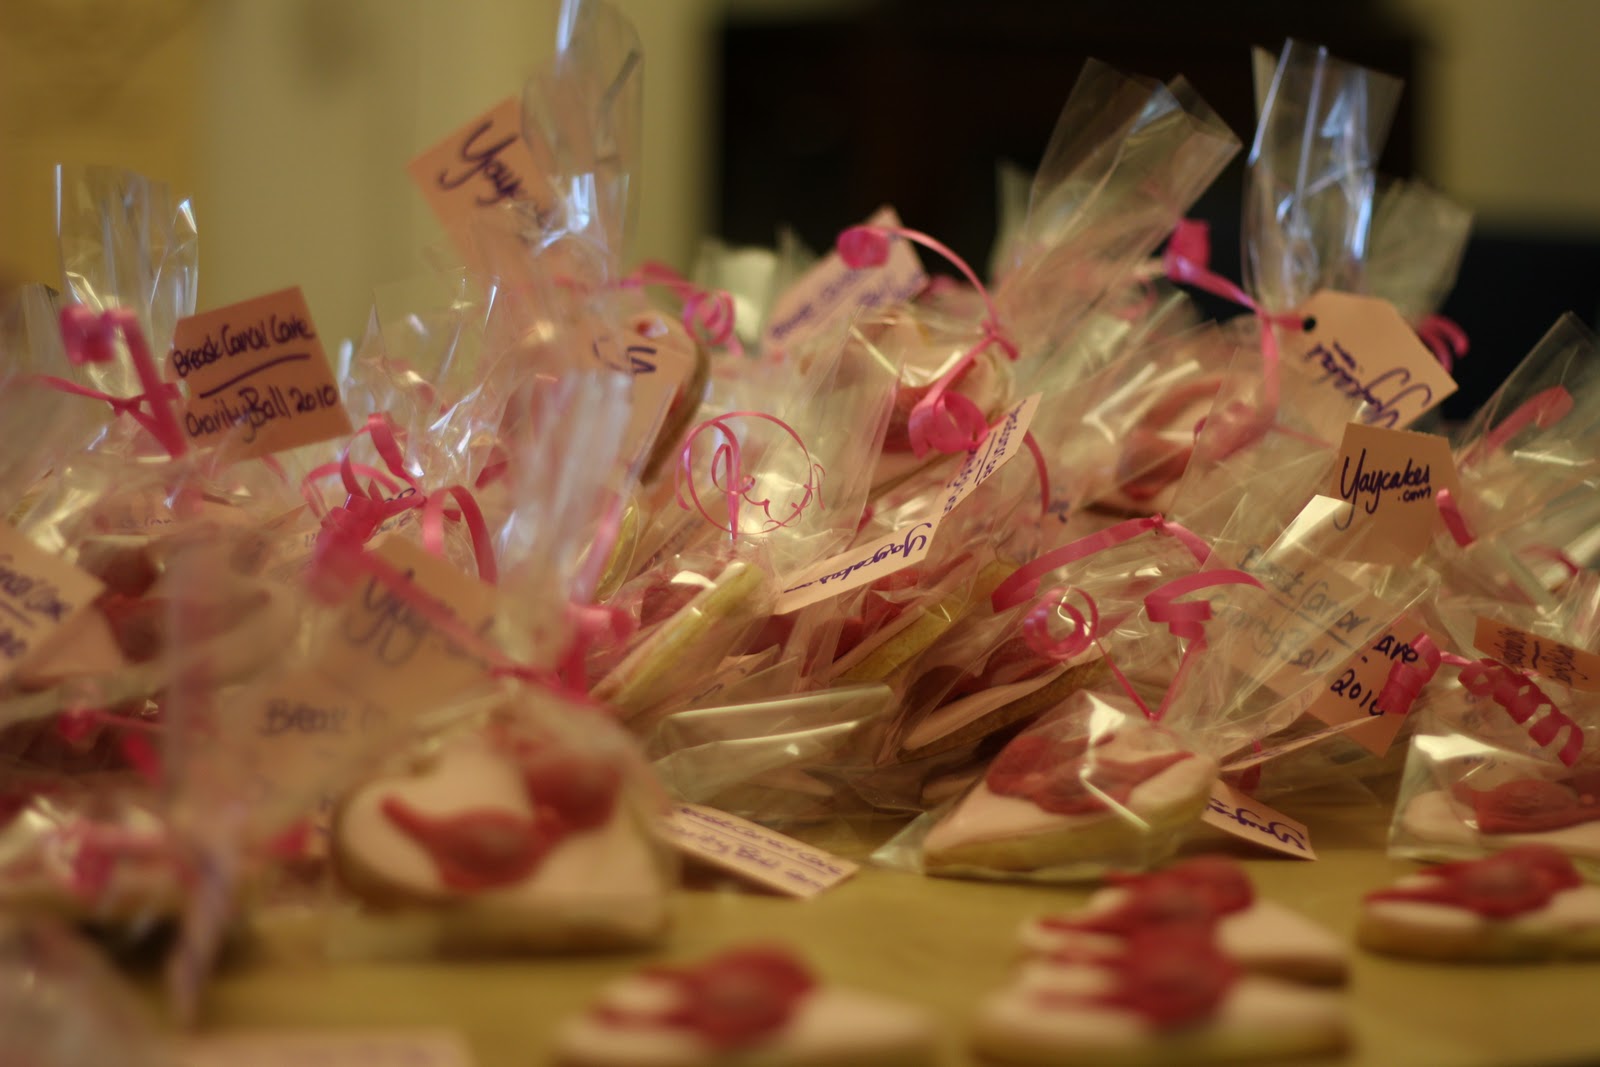
Assembling of the finished product was done a few days before so that they would be as fresh as possible but with a few days spare for any emergencies!

I knew that it would be silly to expect my ancient little oven to be able to cope with all the biscuits, so my mum kindly let me use hers.  I tend to stick the the Hummingbird Bakery's sugar cookie recipe whenever I make biscuits that I'm going to decorate intricately as they're really sturdy and always taste delicious.


And so, several bags of sugar and flour later, I had over 200 heart shaped cookies which were left to cool and then bagged up and stored in the freezer.
On the evening of the icing and bagging, I experienced what it might be like to run my own factory.  Thanks to the help of my wonderful boyfriend, friends and mum, we were able to get an incredibly effective production line going!  As I iced the biscuits, my factory workers (!) threaded tags, curled ribbon, spread buttercream on the biscuits, bagged and tied, so that 9 hours after we began, the mission was complete.

I began by colouring up my sugarpaste until it was a pale pink.  I then rolled it out and cut out hearts using the same cutter I had used for the biscuits.  These were then attached to the biscuits using a very thin layer of buttercream.  I then used a smoother to make it really flat and neat.

I then let down some sugarpaste until it was thin enough to pipe and then piped dots onto the back of the bras before sticking them onto the hearts.  I found this to be the best way to attach them.

Meanwhile in the room nextdoor...

carla threads!
paul curls!

And eventually, we ended up with a thoroughly pleasing sight...


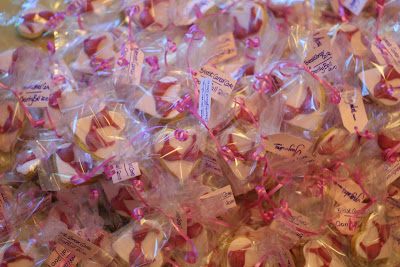
So a few days later we took them along to the Marriott Hotel where they were added as the finishing touches to each of the tables...

And so there we have it. Thanks to mum, Tom, Carla and Paul for all their help, also to Tom for the beautiful photos and a massive congratulations to Susan and all those who helped put on this wonderful event.  Can't wait til next year's one!

Monday, 29 November 2010

New born babbers

I was asked to make some cakes for a baby shower for a mummy-to-be who was due to have twins, but since she had them early, the shower got cancelled and they ended up being new baby cakes (sorry if the song is in your head again now)

I had lots of fun making these!  It took me a little while to think of 12 different baby-related things as i wanted to make each cupcake different and I was asked to double some things up, because of there being twins.


I used cutters for the hearts and bunny rabbit and all the rest of the decorations were done by hand.
I started of with these little shoes.  I began with a little fat sausage shape and then slowly pushed a small ball tool into it until I got the little hollow shoe shape.  I did the straps using thin sausages and made indents in them with the end of some scissors.
The pram took a few goes to get rights. I used circle cutters to create the main parts and then added little strips for the handle and down the middle.

I did the roses and balloons in the same way as the ones in the last blog.  Made these ones extra shiny.


To make these little number blocks, I made some little squares and then used a very fine paint brush with some watered down gel dye to paint on the numbers.
The bottles took ages to get right as it was really difficult to hold them gently enough for my fat fingers not to smoosh away all the detail. And as for the rattles...they caused a liiiitle bit of stress but the end result was pretty nice.  Just fiddly.


Happy 1st birthday Ava

My cousin Ava turned one recently and I was asked to make some cupcakes to celebrate.  I decided to stick with a natural colour for the buttercream and went for mainly pastel colours for the decorations.

After much deliberation, i settled on bunny rabbits, teddy bears, butterflies, hearts, presents, balloons and roses.


I piped the buttercream on in pretty swirls before adding the decorations i had made earlier on in the week.

 I made the bunny rabbits using a very cute cutter that i found in a very cute shop in Lewes.  I don't remember how much i paid for it but i remember thinking "Bargain, mate".  I added some detail by sticking on a bobbly tail, making an indent in the ear and one for the eye and then dusted them with glitter and a pearl lustre.


I decided not to go with string for the balloons, but instead selected some individual hundreds and thousands that matched the colours i had used and stuck them just below the balloon to give the impression of a little knot.


I went for some classic sugarpaste roses as well, which I have to say, I have become quite speedy at making.  When i first learnt how to do them it took me yonks to get a nice neat one, but now, give me the paste and I'm away.

These little blue teddies looked really effective and were a bit like alien bears. 


To create these, I used two different sized mini heart cutters, the larger one for the dark pink and then the smaller one for the lighter pink which i stuck on top.  Got those cutters at Cake International the other day and I can't stop using them!

I created my butterflies by using a textured rolling pin to make a patterned surface.  I then used a cutter to get some butterfly wings.  I placed the body of the butterfly which is just a thin sausage onto some baking paper, which was folded in the middle and rested on top of an opened book and then glued a wing to each side.  Because I left them in this position for a few days to dry, they kept their fluttering shape when i stuck them on top of the cakes.

Finally, the little presents.  After making little boxes out of sugarpaste, i then made indents where the ribbon was going to go.  I used some of that new Dr Oetker Designer icing which i put into my own piping bag and then piped the ribbon onto the pressies.  I used an edible ink pen to do the dots on this one.


You may have noticed a considerable improvement in the quality of my photos.  Unfortunately I can't take credit for this as it is down to my chap Tom's fancy new camera and awesome photography skills.  Thanks for them Tom.  Should you or anyone you know be getting married any time soon, you can make use of his talents for your Wedding Video