
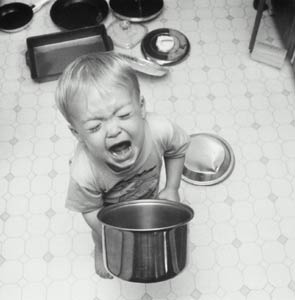
Tantrum in the kitchen
More often than not, edible birthday presents are the best kind. That's why I opted for a birthday cake in the shape of a birthday present!
I knew this was going to be somewhat of a challenge. There were sure to be a number of hurdles along the way. I got over most of them and whacked my shin on just a few. This was a good exercise in keeping calm and a realisation that cakes can be quite unpredictable, no matter how meticulously you plan your creations.
That moment when you open the oven door to discover that your cake has risen to just half of the height you expected can be a toughy. However, I am learning more and more each time I make a cake, that you have to be prepared to adapt things as you go along. That may mean changing dimensions, making extra cakes, re-thinking methods. Anything that you can do to avoid scrapping perfectly tasty, but unfortunate looking baked goods.

If i do say so myself, you'd probably never guess that i threw a hissy fit halfway through making this cake.
Inside was a rather beautiful chocolate sponge. It's a good'un. Lush chocolate cake recipe

The cake should be attached to the board with royal icing or
buttercream
tip: If either of your cakes sink (ahem) put the sunken side underneath. This way the top of the cake will be flat and the buttercream in the middle will fill in any gaps.

I then covered the outside of the cake with a thin layer of buttercream. This works as a kind of polyfiller and smoothes out any dimples in the cake to give you a nice smooth surface to work with. You can also use ganache or marzipan for this (although i wouldn't recommend putting marzipan on a chocolate cake...)
 |
| stabbing the gel dye into the icing is fun... |
Then came the colouring of the paste. Colouring up large amounts of sugarpaste with gel dye can be an arduous task so be prepared to get achey hands and to get a bit messy.
The decorating of the cake took a few days to complete, waiting for bits to dry etc.
I had made the stars a week or so earlier as they were a job in themselves...

Stars on wires (in a spray)
You will need:
sugarpaste
gel dye
edible glue
florists' tape
flower pic
florists' wire
rolling pin
icing sugar for dusting
star shaped cutters
wire cutters
pliers
Colour up your sugarpaste.
Cut your wires into 3 (you could cut them into more or less if you wanted shorter or longer wires)
The thickness of your stars will depend on the strength of the wire you've chosen (although probably no thicker than about half a centimeter as they'll look bulky). The thinner the wire, the more you will be able to bend it and the more movement there will be. However a thinner wire will need a thinner star otherwise it wont stay up, so try a few different thicknesses out. Push the wire into the star and hold the wire at the bottom to see if it sits how you want it to.
Once you're happy with the thickness of your stars, sprinkle some icing sugar onto a clean non-stick surface and roll out enough paste to cut out all of your stars in one go so that they're all the same thickness.
Bend one end of each of your wires so they have a tiny hook.
Dip the end into your edible glue and while it's flat, carefully push it into your star. Be careful not to push it in too far so that it comes out the other side. Do this to all of them and leave them to dry flat.
You can of course make any shape, not just stars. You can also decorate them however you like. I used royal icing to pipe '21' onto all of mine and then covered them with edible glitter.
Give the stars a few days to dry completely.
To arrange them on your cake, put them all together in a bunch and get them looking nice and neat.
Cut off any straggling ends of the wires.
Using your floristry tape, bind them together at the end. Don't tape too high up otherwise you won't be able to pull them apart.
Push the ends of the bound wire into your pic. The pic is the only part that can safely be put into edible goods.
push your pic into the centre of the cake and then put the wires around until they look beautiful.
tadaaa!!
All in all, this cake was a huge success and i'm rather looking forward to making it again. Get your orders in quick!!
You had a tantrum making that? I'm not surprised, I would have too.
ReplyDeleteWhen you colour the icing do you wear gloves? Because I can't go anywhere near food colouring without my hands changing colour.
I think the cake is fab, and your friend must have been really pleased. Looked tasty too.
wow wee amy, your really getting good at this cake malarky. im v impressed xx
ReplyDeletehello chaps! didn't see these comments til just now!
ReplyDeleteHelene, no i don't wear gloves. The gel dye washes off really easily, not like liquid dyes. They're not really any good for sugarpaste anyway because they make it too wet. And thanks for saying it looks good!
And thanks to Becca as well! xxx